Blog
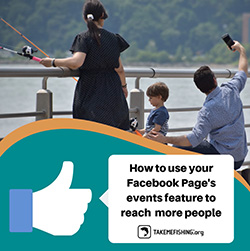
You have a Facebook page and that’s awesome! Now ...are you using its Facebook Events feature to get more people outdoors? Don’t worry! We’ll help you get started.
Facebook Events are an ideal way to share upcoming fishing and boating events in your community. People will be able to tell you if they’re interested in attending or RSVP as attendees, and this calendar based-resource will keep users informed about the event while working as a space for posting and sharing to keep everyone excited about it.
Events can be created by anyone, and the creator can invite friends, members of a group or fans of a page. Before you get started, check Facebook Events policies where you'll find important information about features such as privacy settings. Note, once you've created an event you can't change the privacy settings, so make sure you create a “Public” event. That way, more people will be able to find out.
We’ve gathered some tips from the Facebook Help page to help you get started:
Create a public Facebook event on your Page from your computer:
- From your News Feed, click Events in the left menu. You may also have an Event shortcut on your feed.
- Click + Create Event on the left side.
- If you have the option of a Private or Public event, click Create Public Event. Anyone will be able to see your event and search for it, even if you aren't friends. Once you've created a public event, you won't be able to change it to private later.
- Select the Event cover photo or video and fill in the event name, location, date, time and description.
- When you create an event you become the event host. Fill in the co-host section to add Pages or friends as co-hosts. Make sure to include Take Me Fishing as a co-host in this step, so we can share the event in our Facebook Page events.
- Type and select keywords about your public event so it will be discovered by people who are interested in that topic (example: Fishing, Fly Fishing).
- Choose who can edit and post in your event and then click Save Draft if you’re not ready to post yet, Create/Publish to post it right away or Schedule if you’d like it to go live later.
- You'll be taken to your event, where you can invite guests, upload photos, share posts, and edit event details.
To edit an existing event on your Facebook Page from your computer:
- From your News Feed, click Events in the left menu and select the event you’d like to edit.
- Click Edit in the top right.
- Change the event name, location, time, description or co-hosts.
- Click Save.
- Keep in mind that public event creators can change the date and time after creation, but may not be able to if the event is within a couple of days.
Congratulations! You’ve successfully created a public Facebook event and now it’s time to make a bigger splash inside and outside Facebook. Spread the word to get more people hooked.
You can choose from all the options below:
- From your News Feed, click Events in the left menu and click the event you'd like to share.
- Below the cover photo, click Share.
- Select Invite Friends, Share in Messenger or Share as Post.
- You can also copy and paste the event URL into a post or message to post it across your social media channels or add it to other digital communications like your newsletter.
If you’d like to get deeper on this topic, the following resources will help you take your Facebook Events practices to the next level:
- Share your event as a public post and embed it to your website
- Create an ad for your Facebook event
- Delete a Facebook event
- Posting photos and videos into a Facebook Event
- Inviting members of a group to an event
- Post an Eventbright event to your Facebook Page
Maria Dominguez, a self-proclaimed “enthusiastic” Venezuelan communicator, joined RBFF in 2017 as Social Media Strategist. She has 12 years of international work experience in journalism, corporate communications, social media, public relations and radio production.